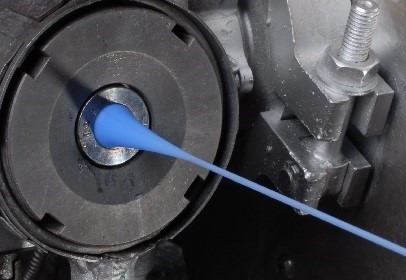
Do your devices measure quickly enough?
FIND OUT
For many years, there has been a strong trend in the wire and cable production sector to produce faster, in smaller sizes, with ever better quality and with savings on raw materials. With the effects of the Covid-19 pandemic, and home working, the need for ever higher communication rates, more data transfer and ever lower latency have further accelerated this trend. Nowadays, wire and fiber manufacturers are investing heavily to achieve these sometimes difficult-to-combine goals.
Measuring equipment must also evolve to meet these new quality control needs. However, conventional equipment available on the market is not always compatible with these requirements. Slow measuring frequencies do not always allow small defects to be detected on fast extrusion or drawing lines.
Let's take the example of the geometric measurement and detection of typical defects such as lump&neck phenomena on an extruded cable. If the number of measurements per second is too slow, the device will not be able to detect these defects on a medium speed line.

If the manufacturer wants to increase the extrusion speed even more, the detection limits of the device will very quickly be exceeded. The device will no longer detect the defects, although they still exist! It then becomes a limiting factor, and the quality of the final product will suffer!
Fast laser micrometer tool
In fact, one of the important criteria to consider when choosing a defect detection device is the measurement speed! Let's take the example below:

Below is an example of the influence of this parameter on the minimum detectable defect size on an increasingly fast production line. If you want to guarantee the detection of defects smaller than a millimeter, the measurement frequency is essential.

For many years, CERSA has been investing in the most innovative and efficient technologies to offer very fast measuring devices. CERSA instruments are clearly the fastest on the market for measuring wire/cable/fiber optics. Our LPS device launched in 2012, for 3-axis measurement of cables up to 5mm in diameter, measures it 20,000 times per second!
When you want to have 100% control over your production, it is also important to check the surface appearance of your wires/cables/fine tubes. This is an in-line analysis and not just sampling after the product is finished. The goal here is to monitor during production and detect very fine defects such as scratches due to drawing, blisters on enameled wires, or lack of plating on very fast production lines.
Very few solutions exist on the market and even high-resolution cameras are limited when speeds increase and diameters decrease!
A measuring tool for surface quality
After many years of R&D, CERSA has launched a device in 2021, dedicated to the detection of surface defects for cylindrical products initially up to 2mm in diameter. The SQM continuously detects and displays surface defects and generates alarms in order to act rapidly on the production line. The benefits are multiple: high reactivity of quality control, drastic reduction of waste and significant improvement in the final quality of the products.
With 200,000 lines per second and very high circumferential resolution, it is the perfect instrument for the characterization of surface defects.

Perfect for high-speed processing!
Numerous tests on wires, cables and medical tubes have convinced our first customers to equip themselves with this truly innovative device. A device designed by CERSA engineers for tomorrow's manufacturers who are looking for certified quality for their products.
• To know more about the SQM system: Clic here
• Also, discover the SQM-F measurement principle by watching our YouTube videos on our channel: Clic Here
Our articles related
Contact the company CERSA MCI
Do you have a specific control and measurement need?
Are you looking for a high-performance control device?
You wish to request one of our services?

.jpg)

