How to use a wire gauge offline ?
FIND OUT
CERSA MCI introduced its LDS range initially to measure very fine wires. How can one measure these wires without distorting them, as happens with conventional devices? Diffraction technology was the solution because it provides very high accuracy to measure wire diameter without any contact and independent of wire vibration. Another question was: how to calculate the ovality of a wire sample simply, accurately, quickly, and with very good repeatability.
A diameter and ovality gauge
One solution is to hold the sample in your hands and rotate it on itself in the laser beam and record the different diameters as you go along. The disadvantage is that this is not very reliable or repeatable because it depends on the technician who performs the measurement. It is also very difficult to keep the sample sufficiently taut during rotation, especially for super-fine wires.
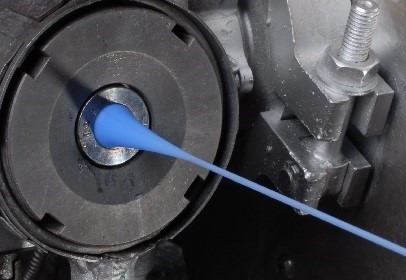
The second solution is to mount the sample on a bracket, then either rotate the sample automatically around its entire circumference or rotate the measuring instrument around the sample. CERSA has chosen to develop an accessory called the WSR (Wire Sample Rotation) that is able to hold the sample efficiently and rotate it 360° while the measuring device calculates the various diameters to obtain the ovality value. Rotation is done by hand. An internal angular coder renders the measurement insensitive to rotation speed. It is absolutely not necessary to use a costly automatized rotation system! This high-precision laser micrometer therefore displays the average, min, and max diameter and ovality of the sample with excellent repeatability and very high accuracy.
Solution for tiny wire measurement
To measure wire thickness and ovality, CERSA has developed two versions of its accessory:
- WSR-S : for wires from 50 µm to 450 µm
- WSR-F : for wires less than 100 µm

Both tools easily grip, stretch and rotate the wire samples at a constant and adjustable tension for accurate diameter and ovality measurement.The WSR-S uses clamps to stretch the wire sample and the WSR-F uses double-sided adhesive tape to avoid wire breakage.

Once the sample is positioned in the laser beam, simply rotate the crank wheel one turn to obtain the diameter measurement over 360°. At the end of the rotation, measurement results are displayed on the local LDS display.By pushing the red button, you can switch between measurement results (average diameter, max, min, ovality, number of measurements during rotation). We recommend using our CIM Lab software in order to benefit from data logging, statistics and display features.
Our articles related
Contact the company CERSA MCI
Do you have a specific control and measurement need?
Are you looking for a high-performance control device?
You wish to request one of our services?

.jpg)

